Approver Registration in the Securosys Authorization App
Before registering an Approver, the Approver must be created by the Approver Manager using the REST API. See this tutorial.
When opening the app for the first time, the Register screen will open.
The registration onboards your device as an approver. Your device will get a public-private key pair, using which the app will sign any authorizations that you will make.
There are 4 options when newly registering:
- Register via QR Code
- Manually register using a form
- Migrate data from another phone
- Skip the onboarding
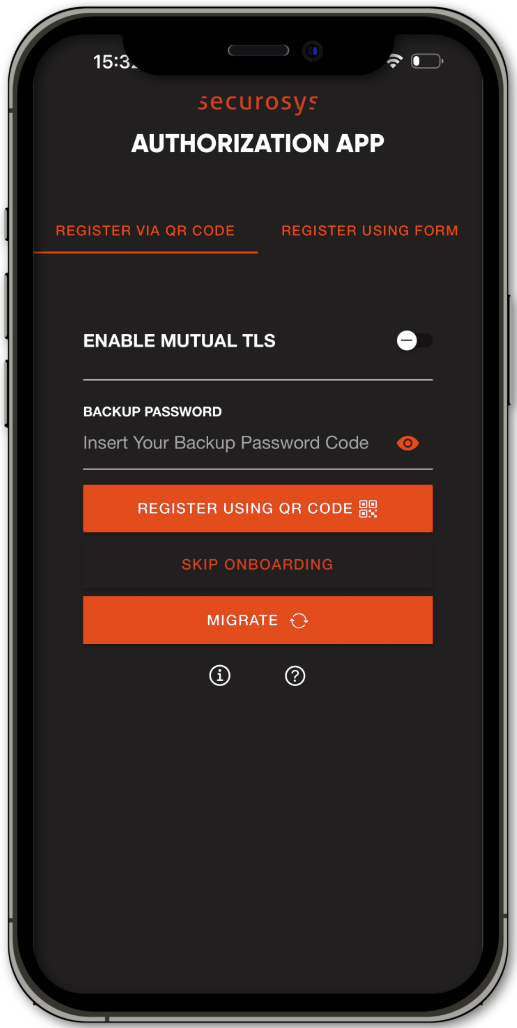
Register via QR Code
For fast new Approver registration, use the QR Code to auto-fill most fields. Proceed as follows:
- Make sure you are in the Register via QR Code tab.
- Enter the requested credentials. These should be provided by the Approver Manager of your organization.
- Click Register.
- Scan the QR code received by the Approver Manager.
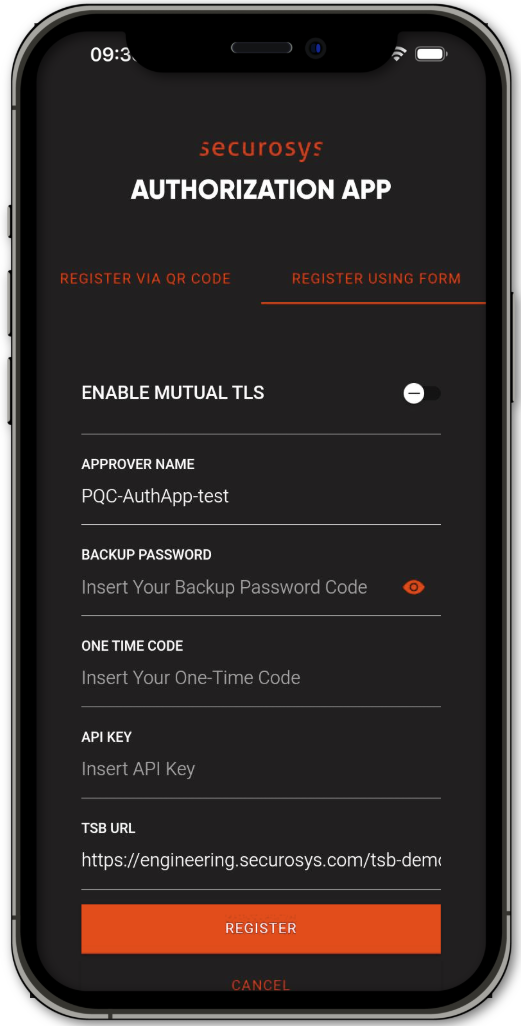
Manually Register
Alternatively, you can enter all values manually. Proceed as follows:
- Navigate to the Register Using Form tab.
- Enter the requested credentials. These should be provided by the Approver Manager of your organization.
- Click Register.
Credential Fields
| Input Field | Description | Required | Example |
|---|---|---|---|
| Enable Mutual TLS | Enable this setting when mTLS is required to authenticate to your TSB. Click on SELECT to select your client certificate *.p12 file and specify the file password if required. See TSB - Configure TLS. | No | client-certificate.p12, client-pass |
| Approver Name | Your authorization user name. | Yes | finance-officer@example.com |
| Backup Password | The password the approver was created with. Make sure to remember the backup password! It is required to register a new phone. | Yes | BckpPass123! |
| One Time Code | One time code used to authenticate the onboarding. Can be re-generated by the Approver Manager. | Yes | 123456 |
| API Key | API key for access control to the REST API. | No | - |
| TSB URL | The full URL link to the Transaction Security Broker, including https://. | Yes | https://sbx-rest-api.cloudshsm.com |
Migrate Data
If you have an existing phone with an Approver, click the Migrate button (shown on both tabs) to start the migration process in the role of the receiving phone. See Migrate Data to learn how to initiate a migration from an existing device.
Skip Onboarding
Both registration tabs provide the ability to Skip Onboarding. This results in the Authorization App not having an Approver registered, meaning no approval or key management tasks are available.
The following features are available without an registered Approver:
You can still register an Approver later through Application Settings - New Registration.
Next Steps
For options to configure the app, see the settings guide. For more information about the app features and step-by-step guides, see the tutorials.