Securosys365 Cockpit Authentication
Security add-in for Microsoft 365
With Securosys365 - DKE, you have the following authentication possibilities:
- Two-Factor Authentication (2FA) (Google Authenticator, Free OTP, Microsoft Authenticator, Email)
- Support for any OpenID Connect identity provider (Okta, Google Identity, Azure AD, ADFS, Active Directory, Big-IP F5, Keycloak)
In this guide we will follow the setup of Azure AD identity provider to configure and define Administrative Authentication. Specifically, how administrators of DKE can authenticate and enter the Securosys365 DKE Cockpit, manage and configure it.
Log in to the Securosys365 - DKE
- Log in to Securosys365 - DKE Cockpit
Two-Factor Setup
- Click on the top right on your Email address (red box)
- Select My Settings
- Select the Tab Two Factor Login
- Enable Mobile Authenticator Setup and Scan the QR Code
Your Securosys365 - Cockpit account login is now 2FA protected.
Identity Provider Setup
- In the Administration Tab open Securosys365 - DKE: Identity Provider
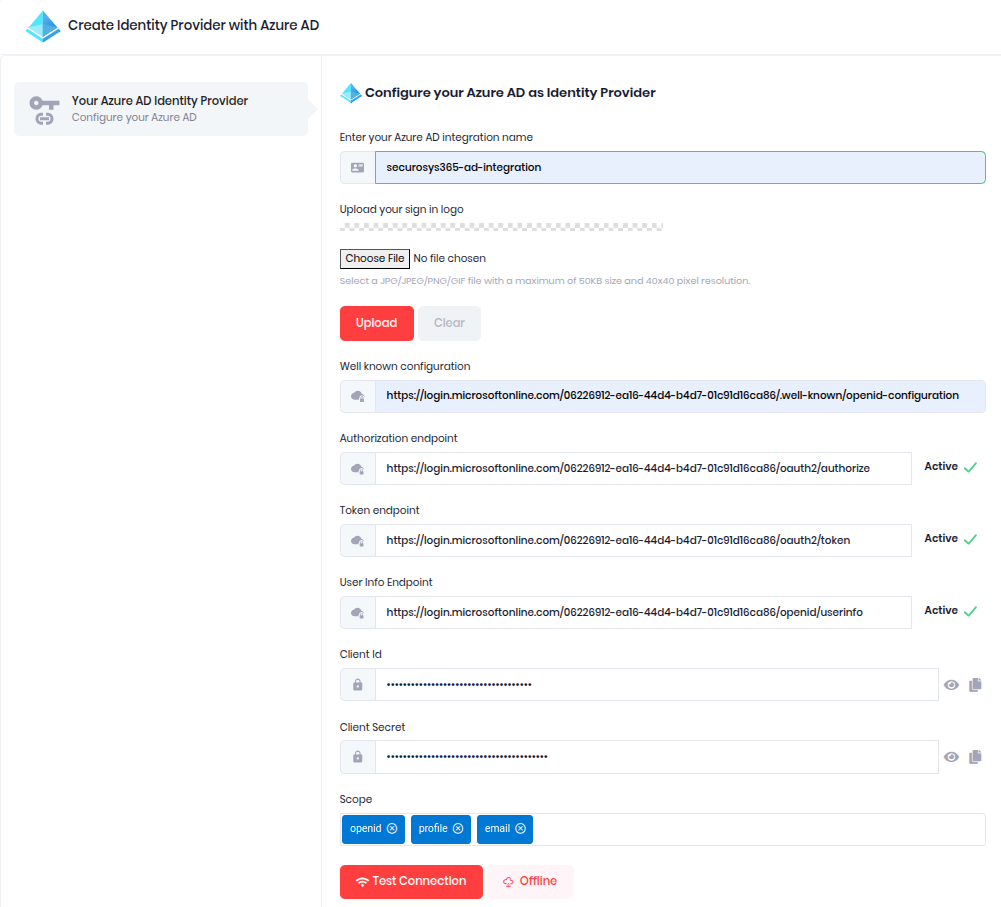
Create new Identity Provider
- Click Create Identity Provider.
- In the Azure AD card, click Install Now
- Enter the well-known configuration
Example: https://login.microsoftonline.com/tenant-id/.well-known/openid-configuration
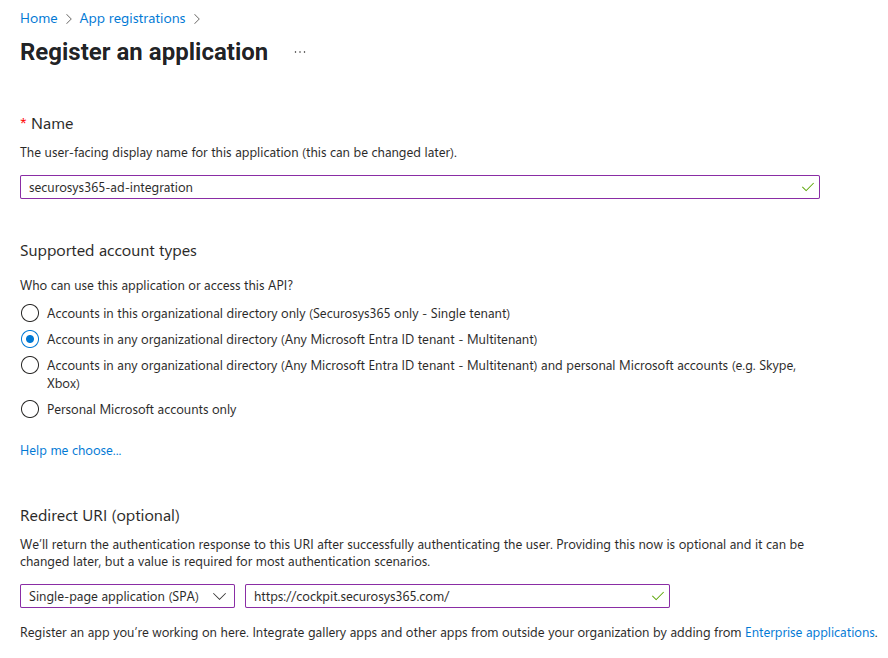
Create new App registration
To create the necessary app registration in Azure, use the sample app in your Azure portal:
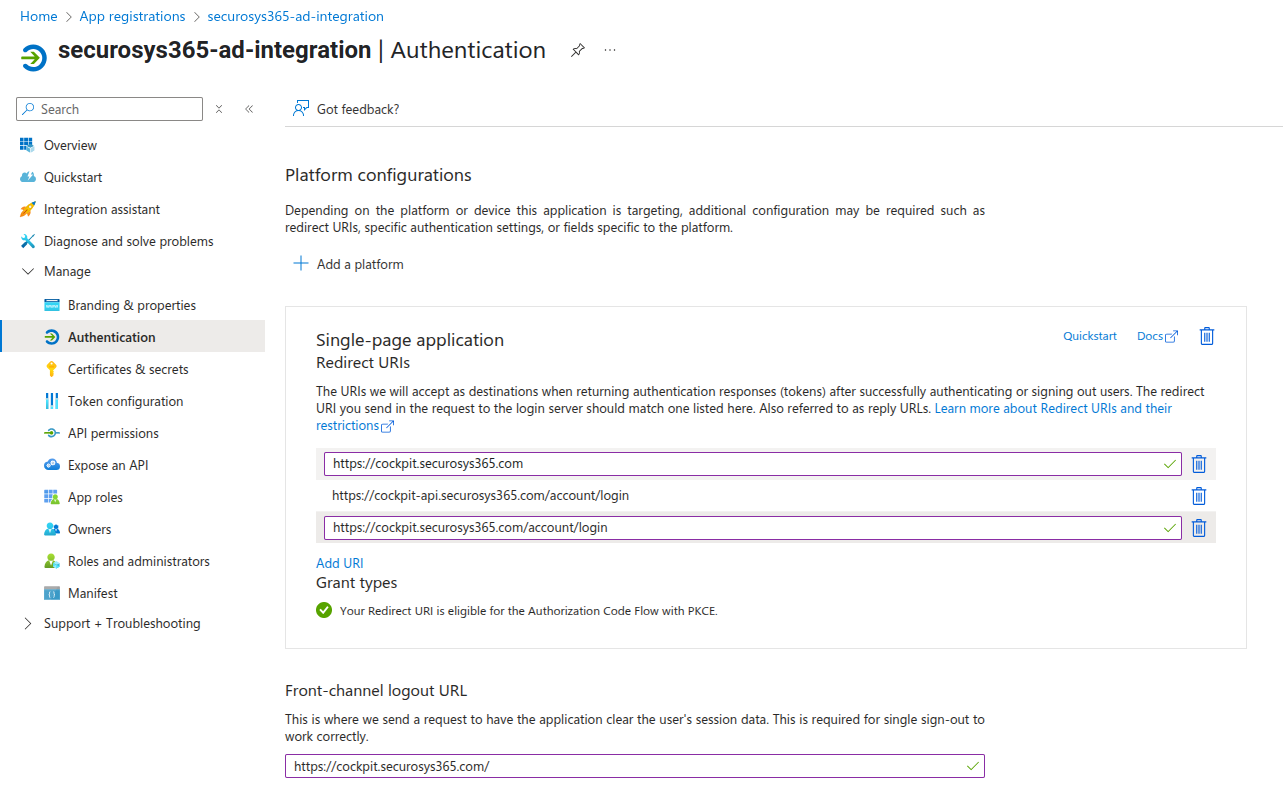
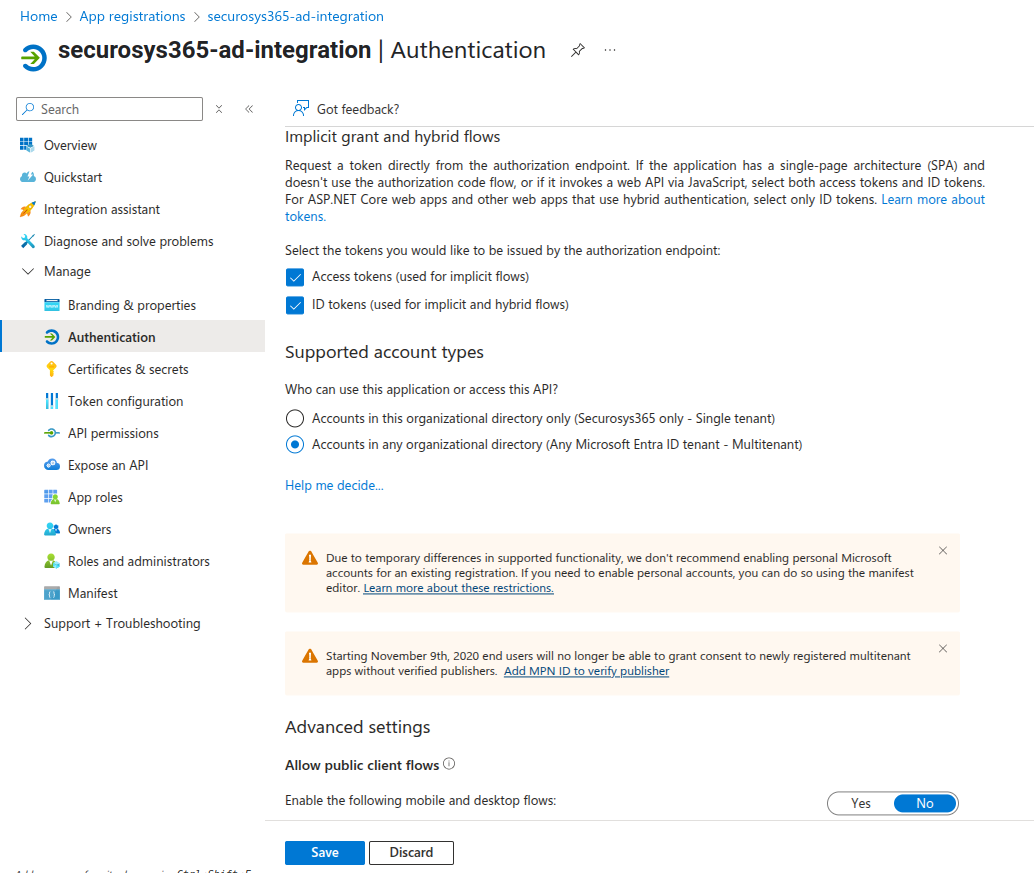
Authentication
Add the following URIs under Authentication
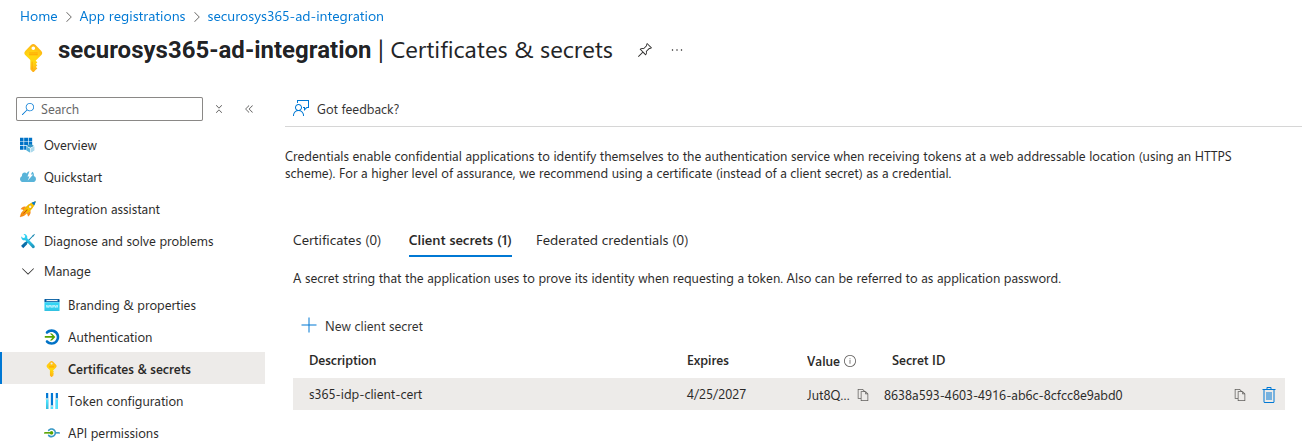
Certificate & Secrets
Configure Certificate & Secrets
- Copy the Client ID and paste into Securosys365 - DKE: Client ID
- Copy the Value and paste into Securosys365 - DKE: Client Secret
Token Configuration
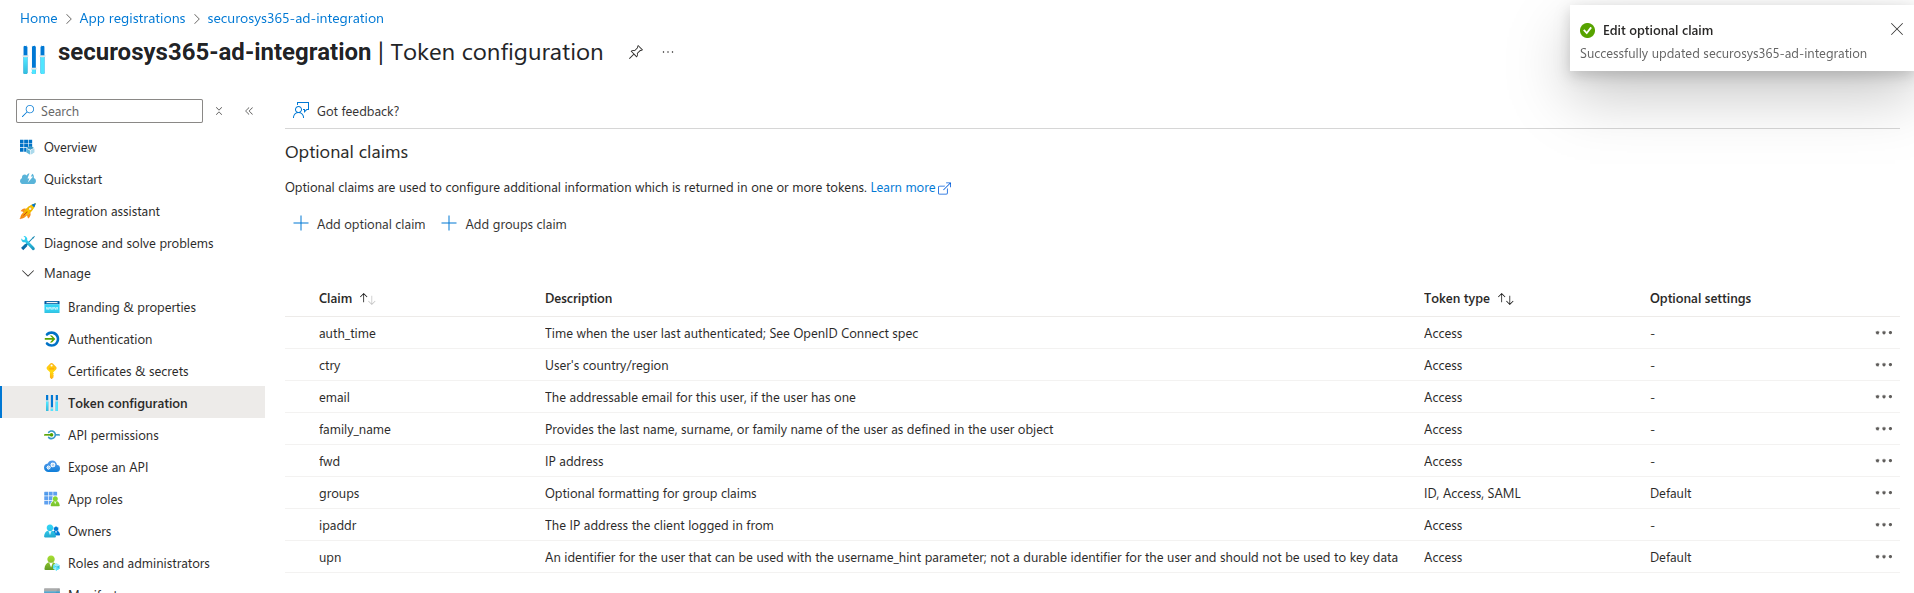
{
  "http://schemas.xmlsoap.org/ws/2005/05/identity/claims/name": "http://schemas.xmlsoap.org/ws/2005/05/identity/claims/emailaddress"
}
API Permissions
Add the following Microsoft Graph API Permissions
- Delegated: email
- Delegated: profile
- Delegated: User.Read
- Application: Group.Read.All
Grant Admin Consent for all API Permissions
Test Connection
-
Fill in the required credentials (Application ID, Tenant ID, Client Secret), then click Test Connections.
A “Test Connection Saved successfully” message will appear.
-
Click Submit.
The Azure AD Identity Provider is now created.
-
On the grid, find your new Azure AD provider:
From the Action dropdown, select Enable:
-
Confirm by clicking Yes:
-
The Azure AD provider is now Enabled.
- Contact the support team
- Book a 30-minute demo