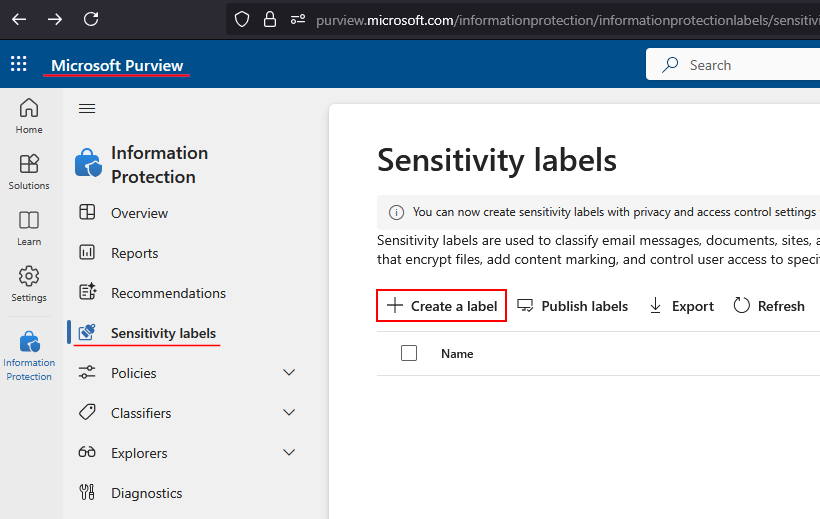
How to create a sensitivity label?
Microsoft Purview Information Protection configuration
The workflow presented below is an example of how to set up Microsoft Purview Information Protection (formerly Microsoft Information Protection) Sensitivity Labels. The configurations listed here are only example configurations and must be set up on a company-specific basis.
You can skip this chapter if you are already familiar with creating Sensitivity labels or your organization has created Label policies.
To create a new Sensitivity label, you must have the correct permission to the Microsoft Purview, described in the Prerequisites.
New Sensitivity Label
Begin by providing the basic details of your label:
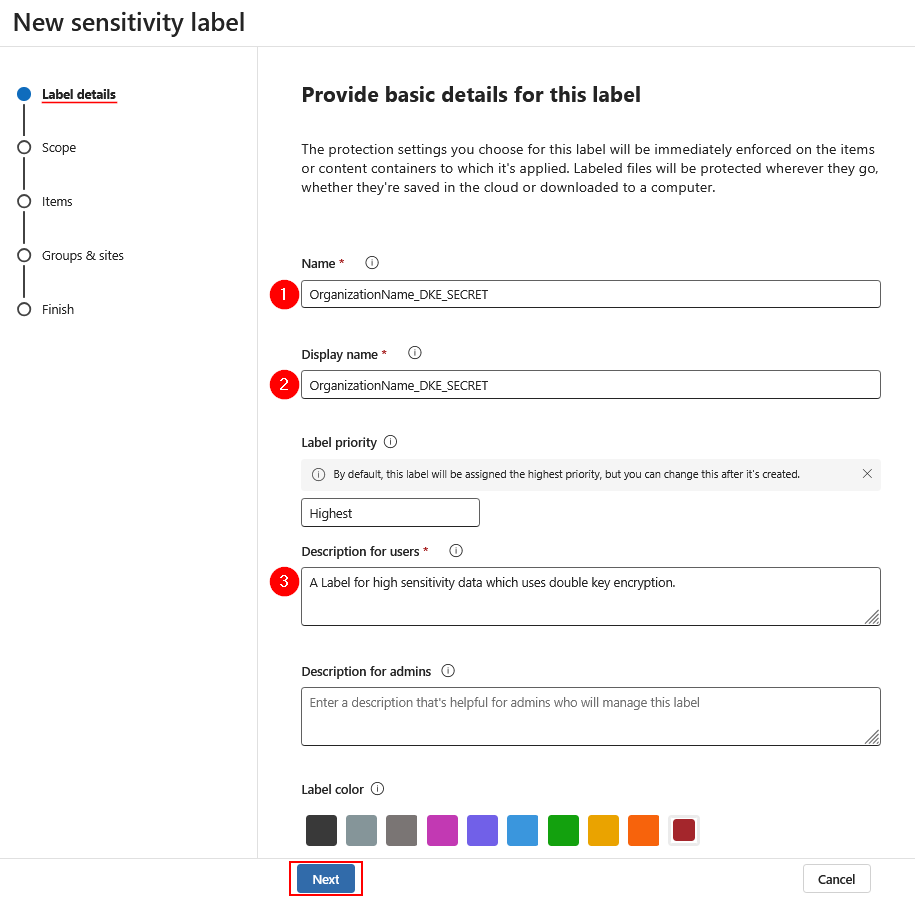
- Name: An internal name for your label, visible only in Purview.
- Display Name: The name of the label that your users will see.
- Description for users: This description is what your users will see when choosing the label to be applied.
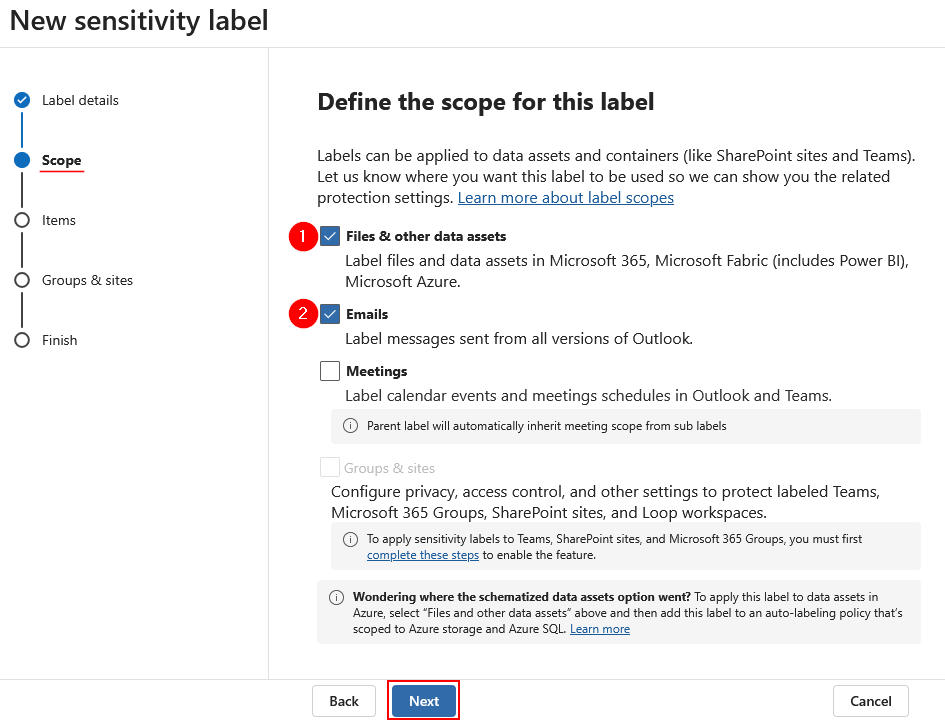
Define Scope of Label
Next, we want to define the scope of the Sensitivity label.
In general, admins can choose between 4 groups: Files and other data assets, Emails, Meetings and Groups & Sites.
For our use case, we only want to select Files and Emails
Protection Settings for Items
The protection settings you configure will be enforced when the label is applied to items in Microsoft 365.
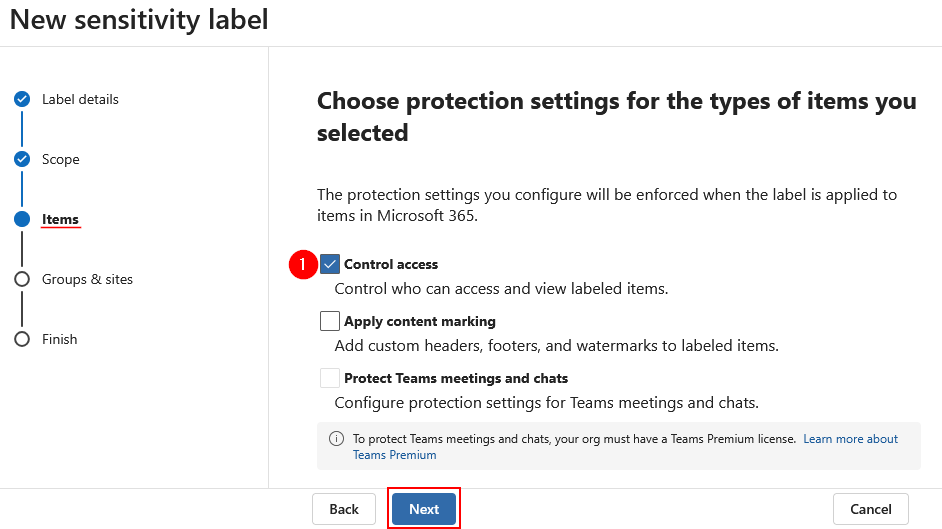
Choose only Control Access from the list and select Next
Access Control
In this section, you define who in your organization has what control over the Sensitivity label.
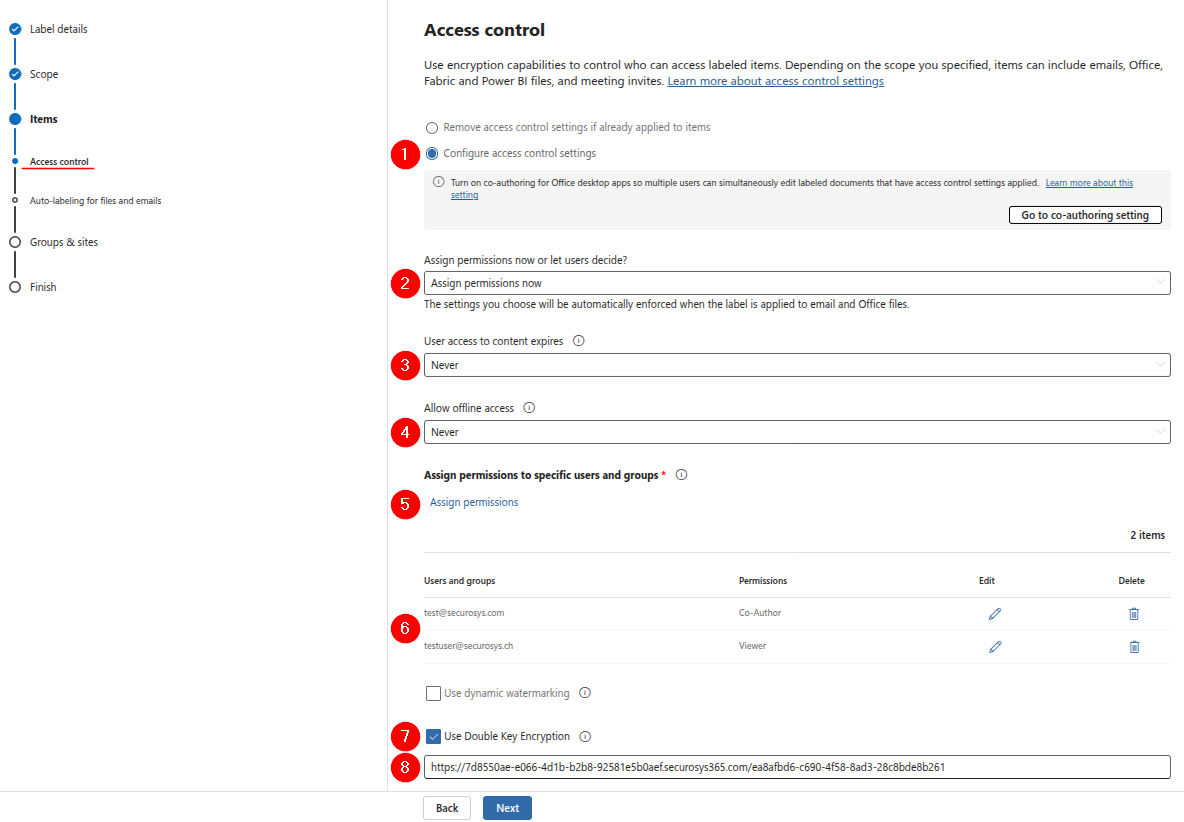
- Configure access control settings: Select
Configure access control settingsto configure them now - Assign permissions now or let user decide: Select
Assign permissions now - User access to content expires: Select
Never - Allow offline access: Select
Never - Assign permission: Choose who in your organization can use the Sensitivity label and who owns it
- Users and groups: For example, you can make the label available to all users in your organization, but make only an admin group the owner
- Use Double Key Encryption: Select
Use DKE - DKE Endpoint URL: Provide your DKE Endpoint-URL that you generated in the Access URL page.
It is recommended to set Allow offline access to 'Never'.
- Never: Use for highly sensitive content (e.g., employee or customer data, passwords, source code, financial reports). This ensures maximum security—revoked users can’t reopen the document. Ideal when access must be fully revoked immediately.
- Always: Use for less sensitive content where it's acceptable for users to retain access for up to 30 days (or your tenant's configured license period) after access is removed.
How it works: When a user opens encrypted content, they receive a use license from Azure Rights Management. This includes their usage rights (certificate), the documents encryption key, and an expiration date (if set, default 30 days). During this time, users can access the content—even offline—without reauthentication. After expiration, they must reconnect to reauthenticate, and any changes to permissions or group membership will take effect.
Further reading Microsoft Purview - Assign permissions now
Finalize Label
The next 2 sections are highly dependent on your company's policies therefore these sections will be skipped.
However, we recommend not enabling Auto-labeling for files and emails and to leave all
Group & Sites Protection Settings unchecked. All default values of the options.
The last page is a summary of the Sensitivity label.
Once you have verified that all details are correct, select Create Label.
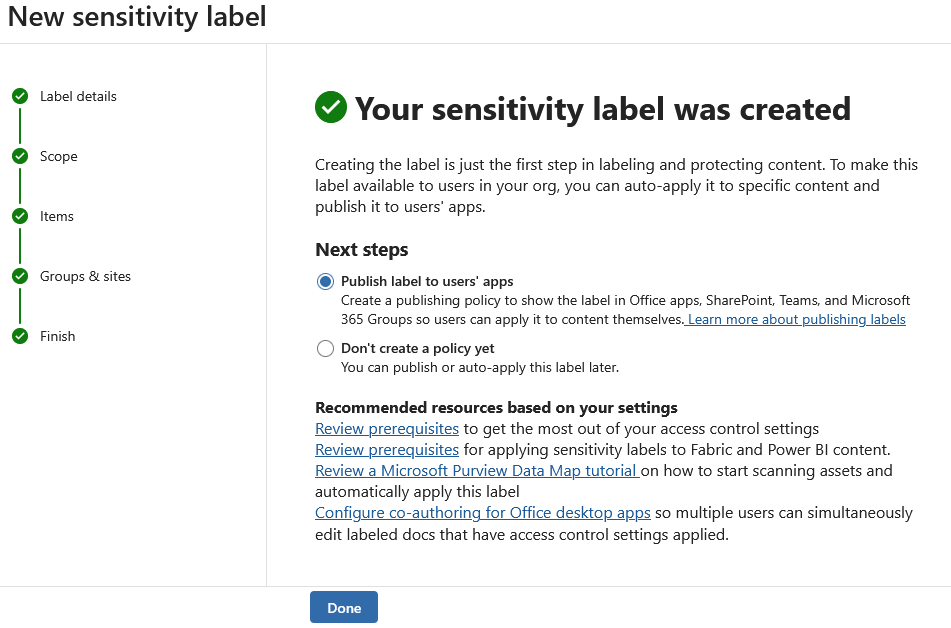
Afterwards, the page will reload and the new Sensitivity label will be created.
Purview will ask you if you would like to publish it now or at a later point.
Selecting Publish label will begin publishing it, the process usually takes a few minutes,
depending on the size of your company.
Publishing Label
If you choose to publish the label at a later point, you can go to the
Sensitivity Labels
page, select your newly selected label and Publish it. This will begin creating a new policy.
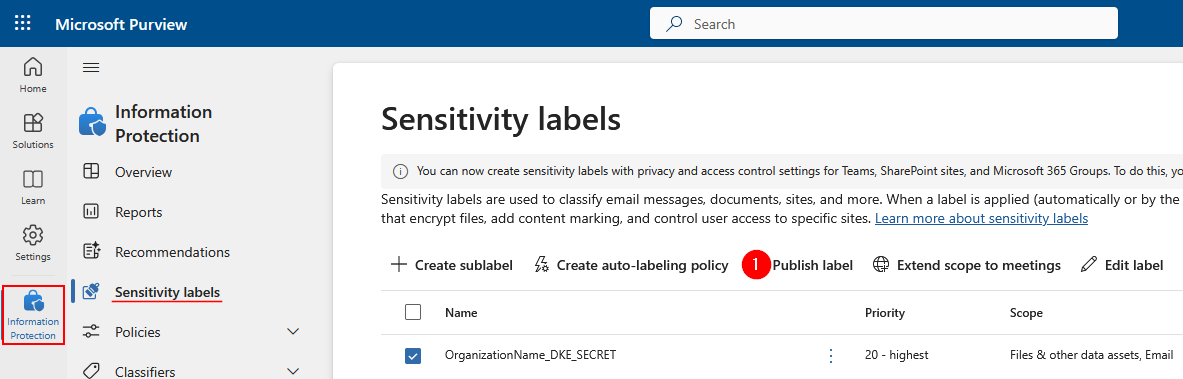
You can publish multiple labels at the same time.
Admin Units
Do not specify admin units. This way the policy will apply to all users and groups. Select Next.
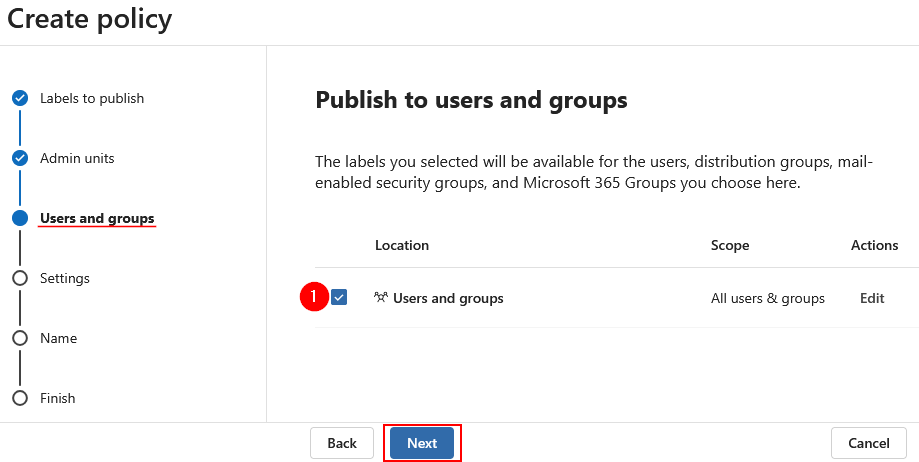
Users and Groups
The labels you selected will be available for the users, distribution groups, mail-enabled security groups,
and Microsoft 365 Groups you choose here. By default, this is all Users and Groups.
Policy Settings
Configure settings for the labels included in this policy.
We recommend enabling Users must provide a justification to remove a label or lower its classification.
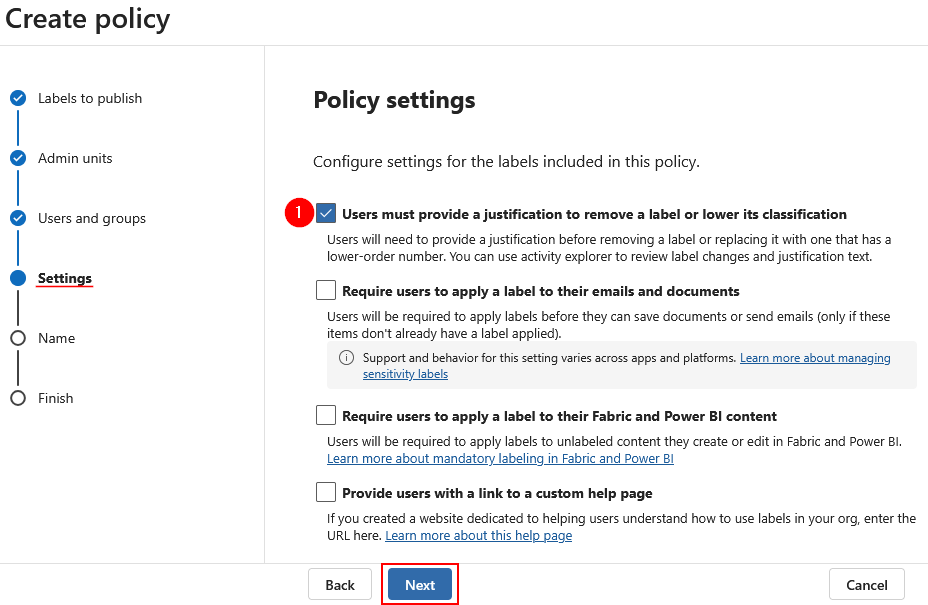
The rest of the settings can all be left as default.
Again, publishing the policy can take a few minutes, depending on the size of your company.
Begin Using Sensitivity Labels
The user must then log out and restart all of their Microsoft related applications (Word, Outlook, Excel, etc.) to see the Sensitivity label in the list. In some cases a full workstation restart is required.
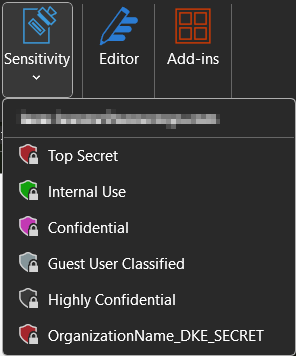
In the above image, there are 5 additional sensitivity labels. These 5 labels are provided by Microsoft. You can read more about them in this article.
While their creation is not explicitly covered in this document, the process of creation is the same.
You are now ready to begin using our Sensitivity labels. For examples, see the Using DKE page.
What's Next
- Next, test your setup by Labeling Documents.