Installing the Securosys XKS Proxy
This page assumes that you have already:
- Installed Docker on EC2
- Configured your HSM (on-premise only)
- Configured your HSM (on-premise only)
For a sample KMS External Key Store configuration please see this guide.
Steps
1. Load Balancing
It is recommended to establish redundancy in your environment. For more information on Securosys XKS proxy redundancy please refer to AWS documentation Creating a network load balancer.
This chapter focuses on the deployment of Securosys XKS Proxy within the AWS EC2 instance which is deployed in the Customer VPC in AWS. This chapter focuses on the deployment of Securosys XKS Proxy within the AWS EC2 instance which is deployed in the Customer VPC in AWS.
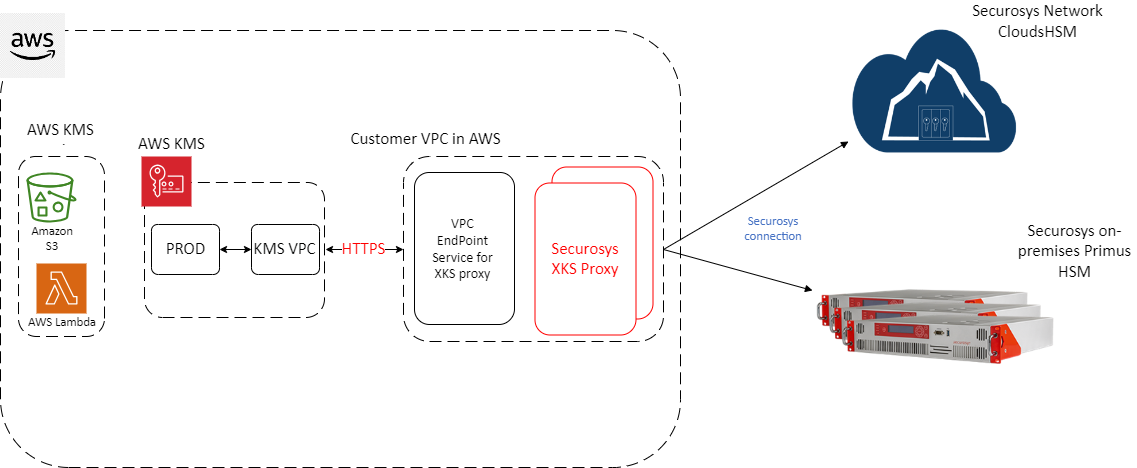 Figure 1: AWS EC2 instance deployed Securosys XKS Proxy architecture with either Securosys Network CloudHSM or
on-premise Primus HSM
Figure 1: AWS EC2 instance deployed Securosys XKS Proxy architecture with either Securosys Network CloudHSM or
on-premise Primus HSM
Figure 1: AWS EC2 instance deployed Securosys XKS Proxy architecture with either Securosys Network CloudHSM or
on-premise Primus HSM
Figure 1: AWS EC2 instance deployed Securosys XKS Proxy architecture with either Securosys Network CloudHSM or
on-premise Primus HSM
2. Download the Proxy
Download the Securosys XKS proxy from the download section (login required).
3. Generate TLS Certificate (Java Key Store)
There are multiple ways to generate a .jks file. In this example we are using openssl and keytool utilities. It is required to have these utilities preinstalled on the device where the .jks file will be created. There are multiple ways to generate a .jks file. In this example we are using openssl and keytool utilities. It is required to have these utilities preinstalled on the device where the .jks file will be created.
A prerequisite step for this example is to generate a certificate for your domain.
For the next steps you will require your *.ca, *.crt files and a private key (or simply using a self-signed certificate).
- To generate a .jks from these files you need to combine your .crt and.ca files.
Manually copy all data from .ca into.crt, and then you can use the following command.
When prompted provide a password for the newly
generated
.p12file.
openssl pkcs12 -export -in ca.crt -inkey ca.key -out keystore.p12
4. Configure the Securosys XKS proxy
Here is the default application.yaml file. Please adapt the blue marked parameters according to your environment:
# All necessary credentials from hsm
hsm:
  attestationKeyName: 'attestation-key'
  # Make sure you allowed an outbound firewall rule, to allow traffic to the HSM
  # Hosts should be entered sequentially using the list as in the example below
  host:
    - 'your-proxy_host'
    - 'another-proxy_host'
  #Ports should be entered sequentially using the list just like hosts
  port:
    - 'your-proxy_port'
    - 'another-proxy_port'
  user: 'replace-me_hsm-username'
  setupPassword: 'replace-me_hsm-setupPassword'
  proxyUser: 'replace-me_proxy-username'
  proxyPassword: 'replace-me_proxy-password'

# All necessary credentials from AWS
aws:
  host: 'replace-me_domain-name'
  regionName: 'replace-me_aws-region-name'
  accessKeyID: 'replace-me_keyId'
  secretAccessKey: 'replace-me_secretAccessKey'
  #These parameters should not be modified
  serviceName: 'kms-xks-proxy'
  httpMethodName: 'POST'
  debug: 'false'

# Your dns credentials
server:
  port: 443
  address: 0.0.0.0
  ssl:
    key-store: file:/etc/app/config/keystore.p12
    key-store-password: replace-me_keystore-password
    key-alias: replace-me_keystore-keyname

# Logging configuration
logging:
  config: /etc/app/config/log/logback.xml

#Do not modify!
spring:
  mvc:
    throw-exception-if-no-handler-found: true
'hsm' parameters: Change the host, port, and user parameters to match your own HSM client configuration:
| HSM Configuration Parameters | Description |
|---|---|
| AttestationKeyName: ' attestation-key' | Specify the attestation key name. If no attestation key has been created, a new one will be generated when running the Securosys XKS proxy image. |
| Host: - ' your-proxy_host'- ' another-proxy_host' | Specify the hostname or IP address of your HSM, for example ch01-api.cloudshsm.com. For high availability (HA) list all HSMs (including clones) in seperate lines with "-" |
| Port: - ' your-proxy_port'- ' another-proxy_port' | Specify the JCE port parameter. |
| User: ' replace-me_hsm-username' | Specify your hsm user (parition) name to be used with the AWS services. |
| Setup Password: ' replace-me_hsm-setupPassword' | Specify the setup password of your HSM partition, example: B7GSW-2WjB3-eZZjN-zHnGx-2Sdoc. Once the first connection is established, the connection credentials are stored in a hidden encrypted .secret file |
| proxyUser: ' replace-me_proxy-username' | Comment or delete the line if not connecting to CloudHSM. When connecting to your CloudHSM partition specify the proxy username from your CloudHSM credentials. |
| proxyPassword: ' replace-me_proxy-password' | Comment or delete the line if not connecting to CloudHSM. When connecting to your CloudHSM partition specify the proxy password from your CloudHSM credentials. |
Configure the aws parameters:
-
Adjust the 'host' parameter to reflect your DNS hostname.
-
Update the 'regionName', 'access-KeyID', and 'secretAccessKey' parameters to correspond with your AWS KMS configuration for the external key store.
-
If not changed leave the parameters for 'serviceName', 'httpMethodName' and 'debug' as default.: Configure the aws parameters:
-
Adjust the 'host' parameter to reflect your DNS hostname.
-
Update the 'regionName', 'access-KeyID', and 'secretAccessKey' parameters to correspond with your AWS KMS configuration for the external key store.
-
If not changed leave the parameters for 'serviceName', 'httpMethodName' and 'debug' as default.:
| Configuration Parameters for aws: | Description |
|---|---|
| host:' replace-me_domain-name' | Replace with your domain name. |
| regionName: ' replace-me_aws-region-name' | Replace with the region where the XKS proxy will be deployed, example eu-central-1. |
| accessKeyID: ' replace-me_keyId' | Replace with the KeyID of your AWS KMS External key store. |
| SecretAccessKey: ' replace-me_secretAccessKey' | Replace with the secret access key created with your AWS KMS External key store. |
| ServiceName: 'kms-xks-proxy' | Do not change this parameter. Specifies the service name for AWS. |
| httpMethodName: 'POST' | Do not change this parameter. |
| debug: 'false' | Do not change this parameter. |
Specify the 'server' parameters. Within the 'ssl' parameters, provide your DNS credentials.:
| Configuration Parameters for server: | Description |
|---|---|
| port | Leave the port at port 443. |
| address | Keep the server IP address at 0.0.0.0. |
| ssl: key-store: file: /etc/app/config/replace-me_server.jks | Adapt the path to your domain credentials .jks file to match your environment |
| ssl: key-store-password: replace-me_keystore-password | Insert your keystore password for the .jks file |
| ssl: key-alias: replace-me_keystore-keyname | Insert your key store alias |
Logging parameters:
| Configuration Parameters for logging: | Description |
|---|---|
| config: /etc/app/config/log/logback.xml | Adapt the path to the logback.xml file to match your environment |
5. Run the Docker Image
Run the docker image with the following command, replace the variables according to your configuration:
docker run [-d]-name <NameOfContainer> --add-host <YourHostDomain> :127.0.0.1 \
 --network=host -v /home/ec2-user/securosys\_xks\_1.0.0/config-files:/etc/app/config/ \
 securosys.jfrog.io/external-xks/securosys-xks:1.0.0.20230706T1936Z
Parameters for running the docker image:
| Command parameters | Command and parameter description |
|---|---|
| [-d] | Optionally use the -d parameter when the xks proxy is desired to be ran in the background. |
| --name <NameOfContainer> | Sets a name for the running container. Replace <NameOfContainer> with the file name of the compressed container image. |
| --add-host <YourHostDomain>:127.0.0.1 | Adds an entry to the container's /etc/hosts file, mapping <YourHostDomain> to 127.0.0.1 (localhost). Replace <YourHostDomain> parameter with your host domain (used when creating the VPC). The IP address should point to localhost (127.0.0.1 ) |
| --network=host | Configures the container to use the host's network stack instead of creating a separate network namespace. |
| -v /home/ec2-user/securosys_xks_1.0.0/ config-files:/etc/app/config/ | Mounts the directory home/ec2-user/securosys_xks_1.0.0/config-files from the host machine to /etc/app/config/ inside the container.Replace the path /home/ec2-user/securosys_xks_1.0.0/ config-files to match your environment path to Securosys XKS proxy configuration files |
| securosys.jfrog.io/external-xks/securosys-xks:1.0.0.20230706T1936Z | Link to Securosys jfrog repository for Securosys XKS proxy |
Example command:
docker run [-d]-nameSecurosysXKSproxy--add-host xks.securosys.com:127.0.0.1 \
 --network=host -v /home/ec2-user/securosys\_xks\_1.0.0/config-files:/etc/app/config/ \
 securosys.jfrog.io/external-xks/securosys-xks:1.0.0.20230706T1936Z
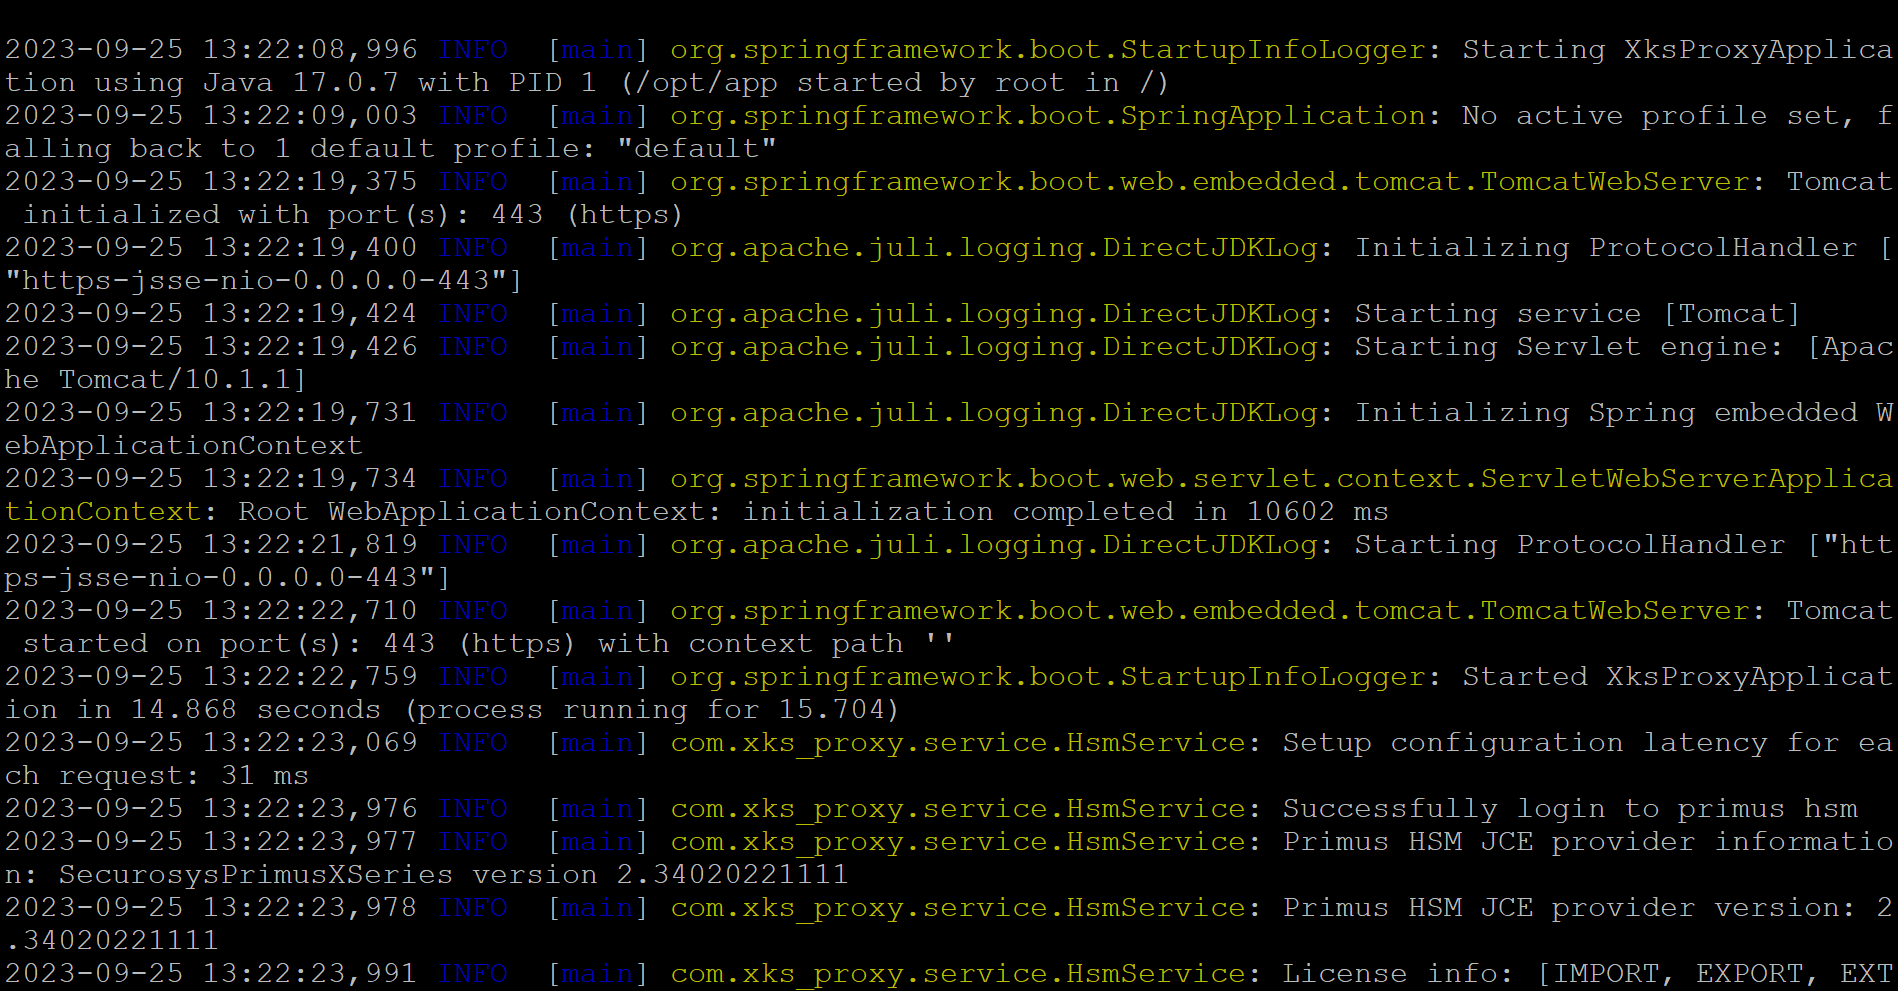
6. Verify the Setup
If the command is successful, the Securosys XKS proxy will be started. If not already present, a new attestation key will be generated. The logs from the boot will output a healthy status:
2023-07-05 05:56:58,280 INFO [https-jsse-nio-0.0.0.0-443-exec-2] com.xks\_proxy.controller.HealthController: AWS REQUEST: HealthStatusRequest(kmsRequestId=1e967d20-9e, kmsOperation=KmsHealthCheck)

2023-07-05 05:56:58,299 INFO [https-jsse-nio-0.0.0.0-443-exec-2] com.xks\_proxy.controller.HealthController: HEALTH STATUS: HealthStatusResponse(xksProxyFleetSize=1s, xksProxyModel=Securosys XKS Proxy 1.0, ekmVendor=Securosys Group, ekmFleetDetails=[EkmFleet(id=hsm-id-1, model=GRIMSEL RX-2.11.2-T, healthStatus=ACTIVE)])
Example boot of the Securosys XKS proxy: