Create Key and DKE Web Service Setup
This page lists all the activities you need to complete in the Securosys365 - DKE Cockpit and Microsoft Purview Information Protection to set up Double Key Encryption.
Login
To log in, go to Securosys365 - DKE Cockpit
- On the login screen, you need to select your Tenant:
- Click change next to Current Tenant: Not selected.
- Turn on the Switch to Tenant option.
- Enter your Tenancy Name.
(You can find your tenancy name in the welcome email or request it from Securosys Support.)
Create DKE Key
To create a new Double Key Encryption key, switch to the tab named Keys and click the button Create new key.
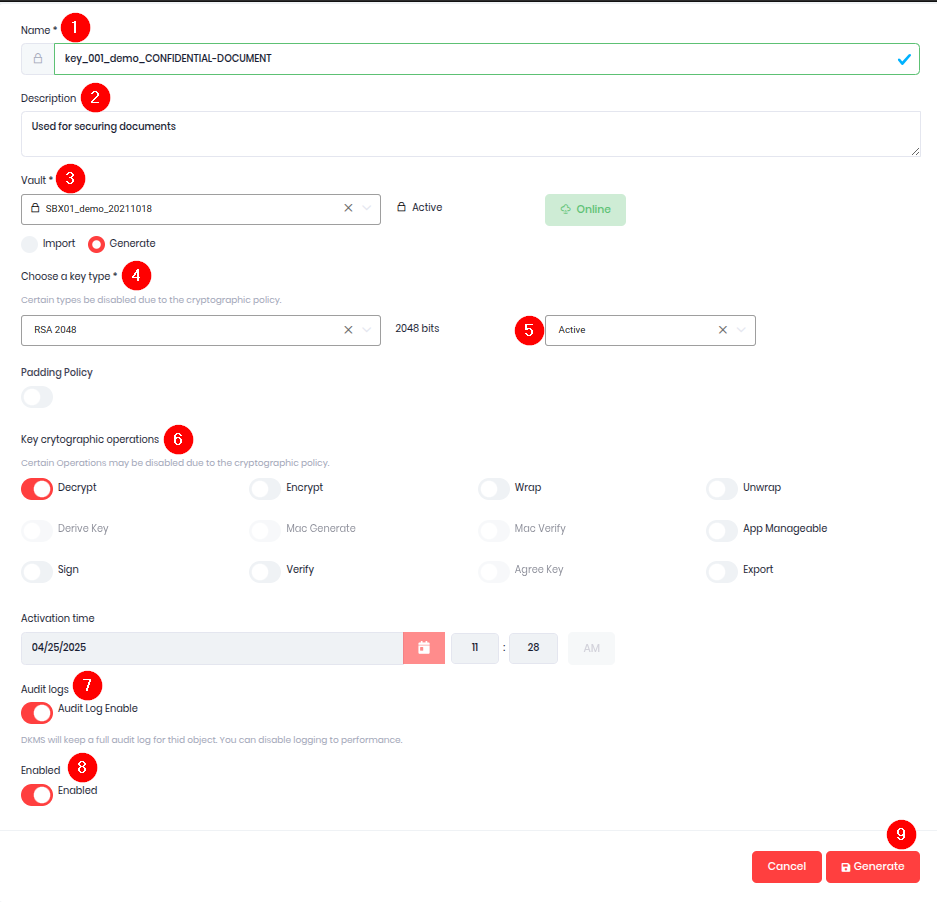
- Name:
key_001_demo_CONFIDENTIAL-DOCUMENT - Description: A brief description of the key's purpose
- Vault:
company_vault - Choose a Key Type: RSA 2048 (currently the only supported option by MPIP)
- Key State: Select
Active - Key cryptographic operations: Decrypt
- Audit logs: Toggle
Enabled - Enable the key: Toggle
Enabled - Generate the Key
Apps
To create a new DKE Web Service, switch to the Apps tab and click on the Create new app. Then select DuoKey for Office 365 > Install Now.

Enter your DKE hostname
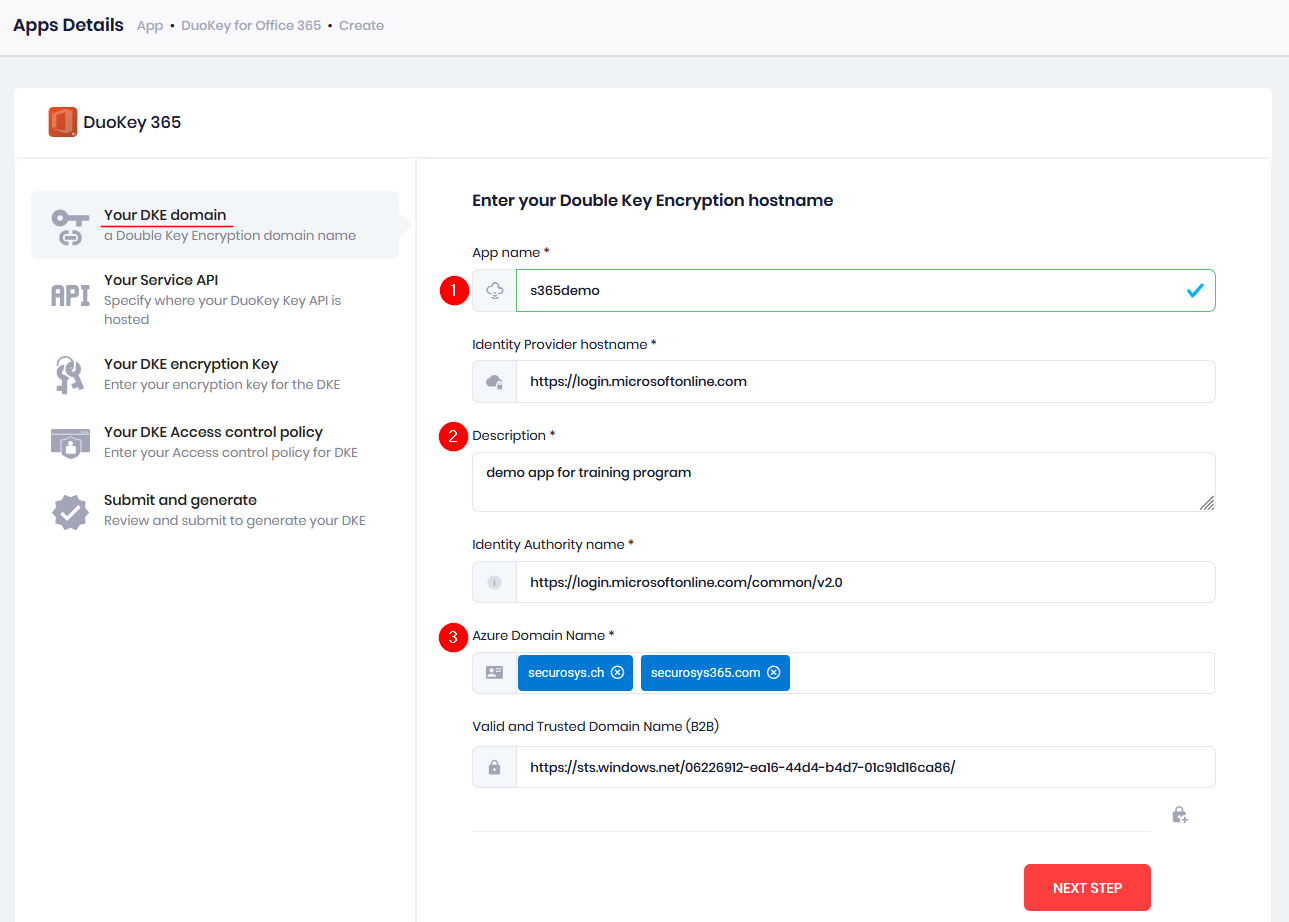
- App Name: Name of your DKE-Service. Must be all lowercase
- Description: A brief description of the use case for the Service.
- Azure Domain Names: Enter the domain names of the Microsoft Tenant domains for labeling DKE documents.
If DKE documents are shared across multiple tenants, you can enter multiple Azure domain names (e.g., securosys.ch, securosys365.com).
The DKE app is configured as a multi-tenant application and supports B2B collaboration (sharing DKE encrypted docs across tenants).
You can update the Azure domain list at any time after the app is created.
Enter DKE Cockpit API
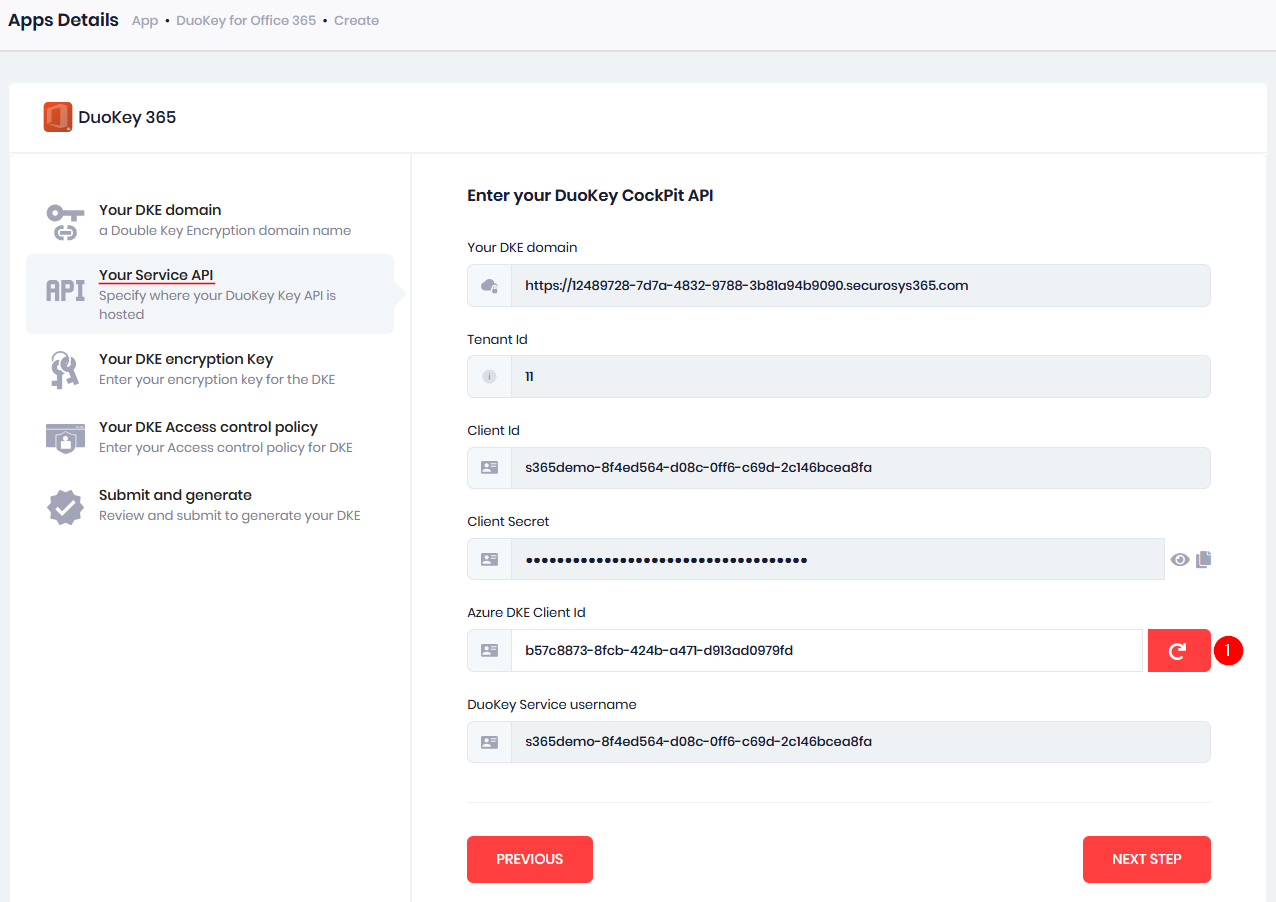
- Azure DKE Client ID: Select the Refresh button to generate a new ID
All other options should remain as default.
Continue to Next Step
Vault
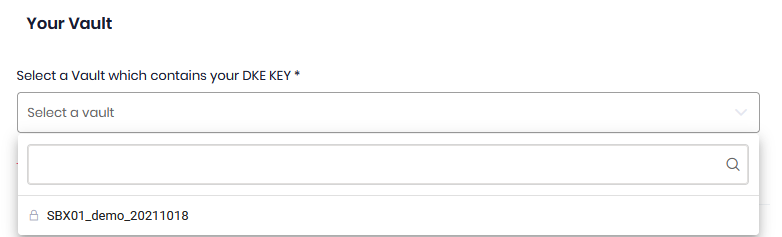
Select the Vault instance that you want to use.
The page will then load a summary of your App so far. You can select Next Step.
Choose DKE Access Control Policy

Select the Access Policy that you would like to apply to your instance.
If this is the first time you are setting up your instance, you may not have any policies defined. In this case, leave this selection empty.
Verify And Submit App Creation
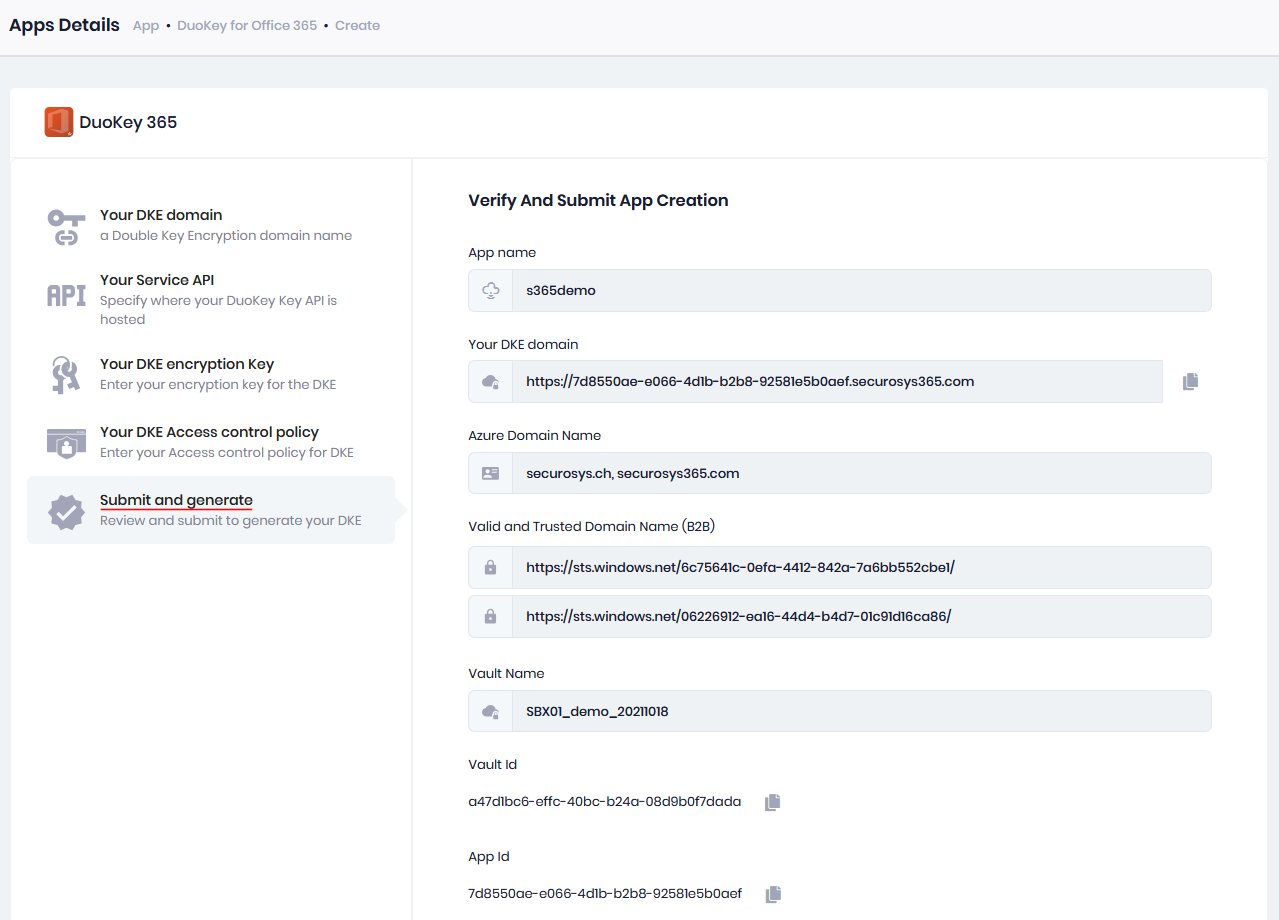
A full breakdown of your instance is displayed. You can now select Submit.
Deploy App
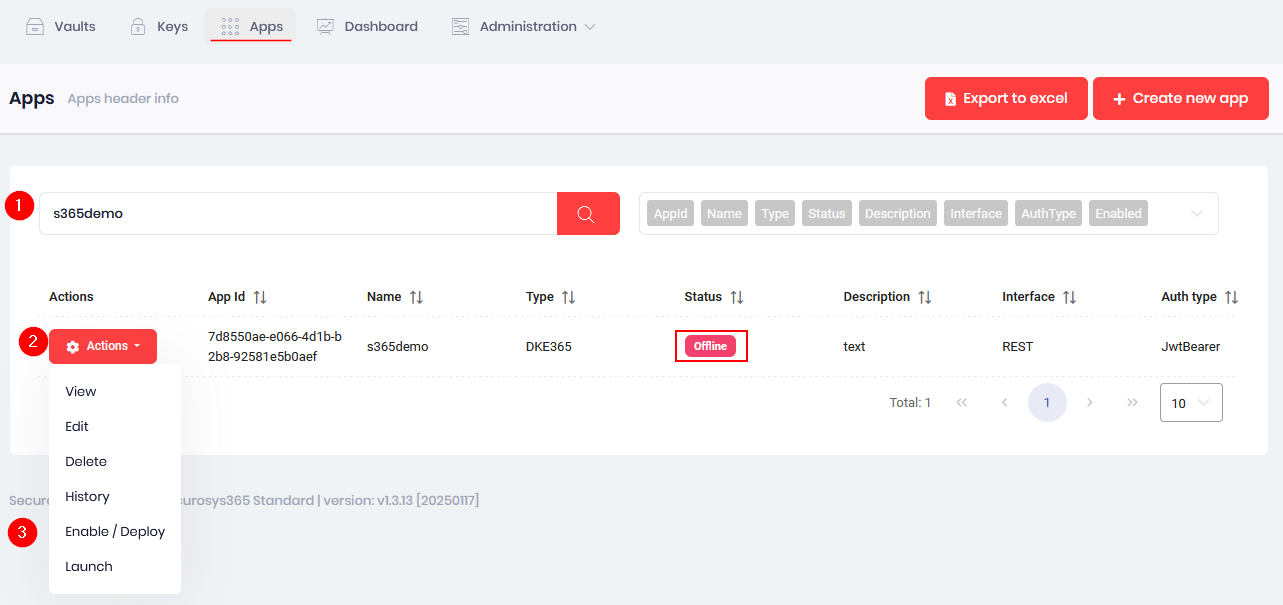
In the App Tab, you can now search for the App you created and deploy it.
- Filter: Filter for your application
- Actions: Open the dropdown for your App
- Select: Enable/Deploy
By default, new Apps are set to Offline
The Service is now submitted and will automatically be installed and started. Installation and startup phase will take about 5-10 minutes.
After completing this process, the status changes from Pending to Online.
Compiling DKE Access URL
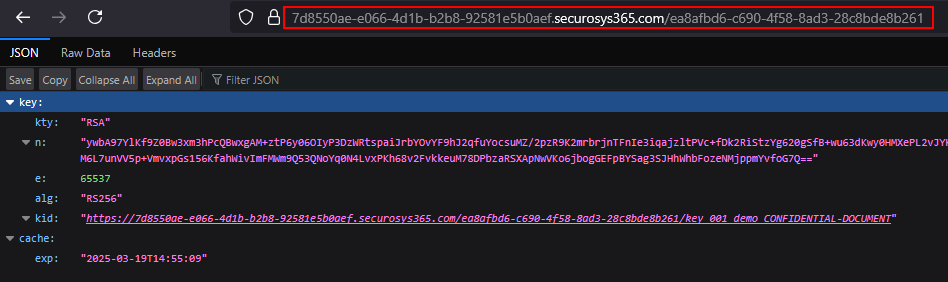
After installing and deploying the Double Key Encryption Service, you have to create an Access URL to create MIP labels with DKE. The DKE access URL consists of a DKE Service URL and the External-ID of a previously created key.
To fetch the DKE Service URL, navigate to Apps → Filter for your App → Actions → Launch:
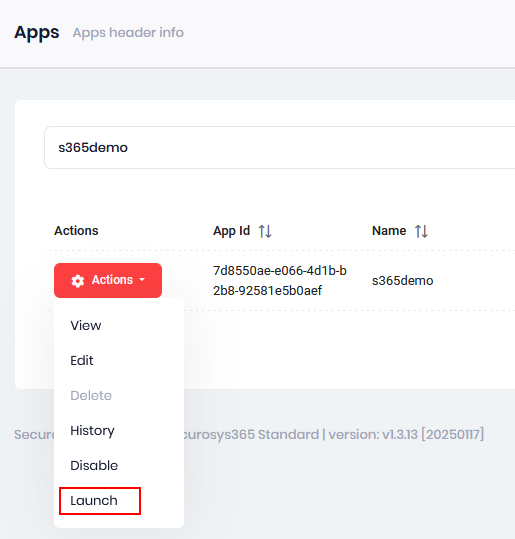
This opens a new browser tab. Copy the URL shown — this is your DKE Service URL/hash.

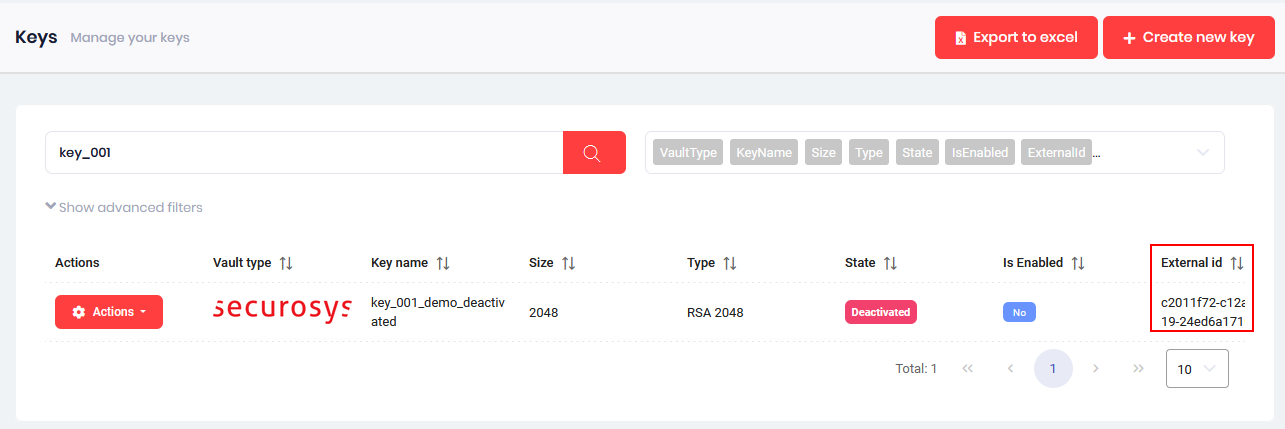
To fetch the External-ID of a key, navigate to Keys → Filter for your Key → External ID
The compiled URL represents the DKE Access URL, e.g.: https://7d8550ae-e066-4d1b-b2b8-92581e5b0aef.securosys365.com/ea8afbd6-c690-4f58-8ad3-28c8bde8b261
What's Next
- Next, provide Admin Consent to the Microsoft App Registration